
Taking great cattle photos can be easier than you think. While having a professional photographer available for important shoots is critical, to be effective, marketing you need to market year-round. Utilizing your own skills to capture the shots you need can significantly advance your marketing efforts. By mastering basic photography techniques, you can ensure a consistent flow of quality images.
Capturing high-quality cattle photos is a skill that is very easy to learn. Initially, it’s common to feel frustrated, there can be so many things to remember. With just a few pointers, you can elevate your photography skills and create photos that highlight all the best qualities in your animals.
In today’s competitive market, making a lasting impression on your ideal clients is crucial. A professional appearance, including top-notch photos, can significantly enhance your credibility and attract potential buyers. Considering the dedication you’ve poured into your business, a professional-looking photo can truly make or break that first impression.
Some key aspects I will cover to help enhance your cattle photography:
- Lighting
- Angles and Foot Placement
- Backgrounds
- Expression
Lighting
To take great cattle photos, the time of day is very important when you are considering taking photos. The first thing you have to decide is, whether are you going for an image that sells the animal or an image that sells the business. If it is the animal you want to shoot at a time of day that best suits the animal. If I am photographing to market a specific animal, I always photograph mid-day. The sunlight lights up the animal’s body so that you are not looking at any detail. If you were to shoot late evening, say around sunset it may be too dark to really capture a good conformation photo.
If I am taking photos of cattle to market the business, I am looking to shoot around sunrise or sunset when the lighting is the best and the images will have more of an artistic look.
Time of day is crucial when it comes to photography. The first decision I make is whether I’m focusing on selling the animal itself or promoting my business overall. If it’s about showcasing the individual animal, I opt for midday shots. That’s when the sunlight is the best. You want your animal well-lit with vibrant colors. Late evening shots around sunset might look stunning, but they can be too dark to capture the necessary detail, especially for confirmation photos. However, if you’re choosing to shoot marketing shots I would shoot around sunrise or sunset. The golden hour light adds an artistic touch and makes the images more visually appealing, helping to promote the brand in a captivating way. By understanding the purpose behind each photoshoot and choosing the right time of day, you can effectively convey the message you want to send to your audience.
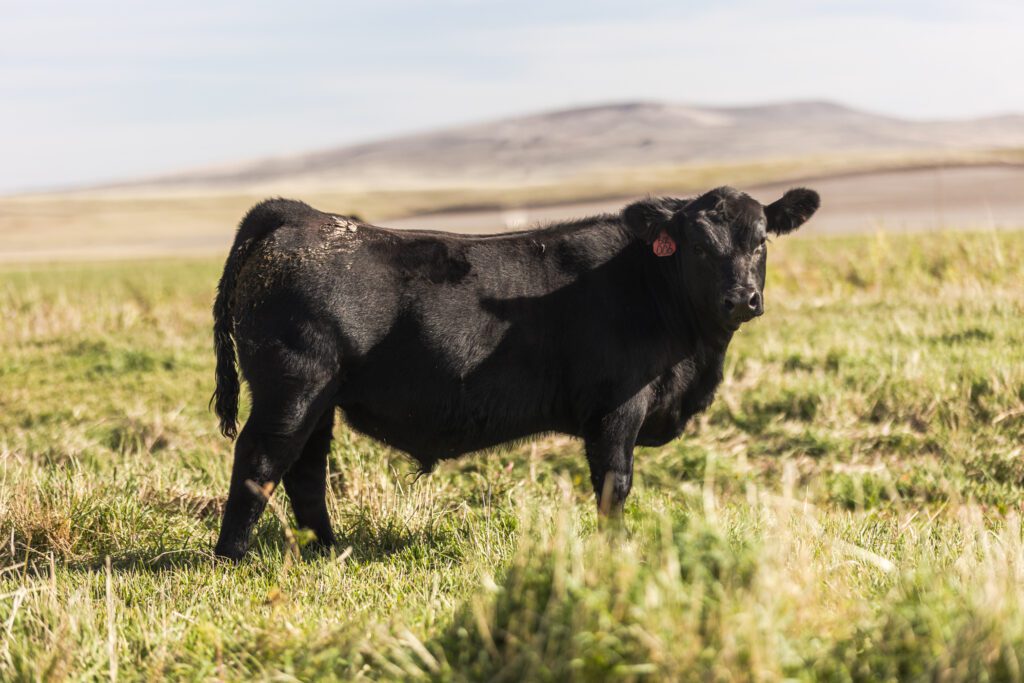
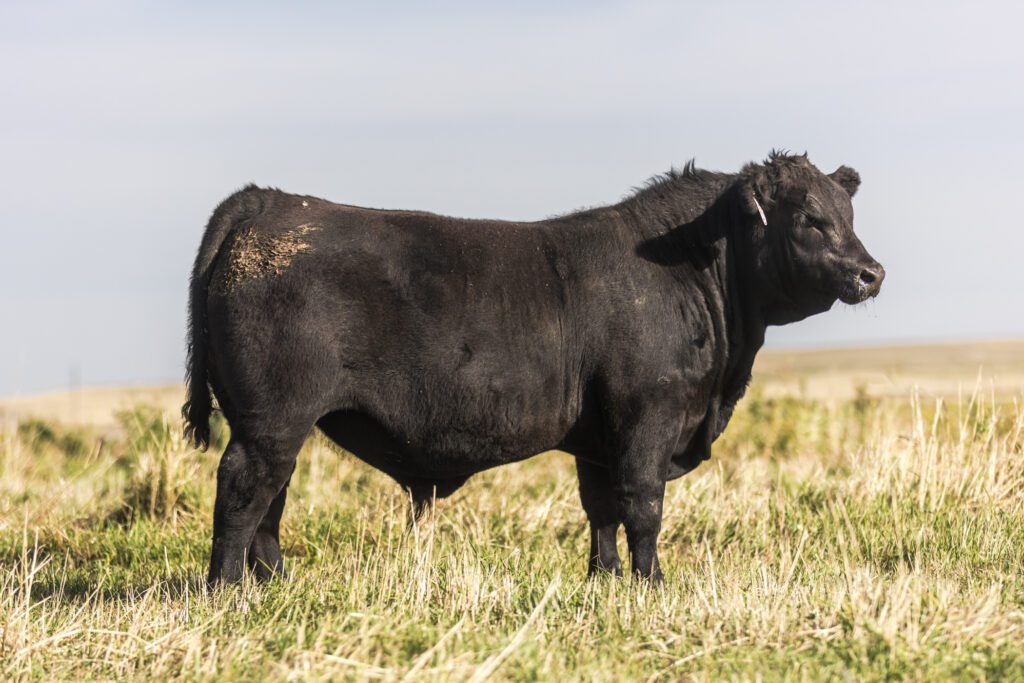
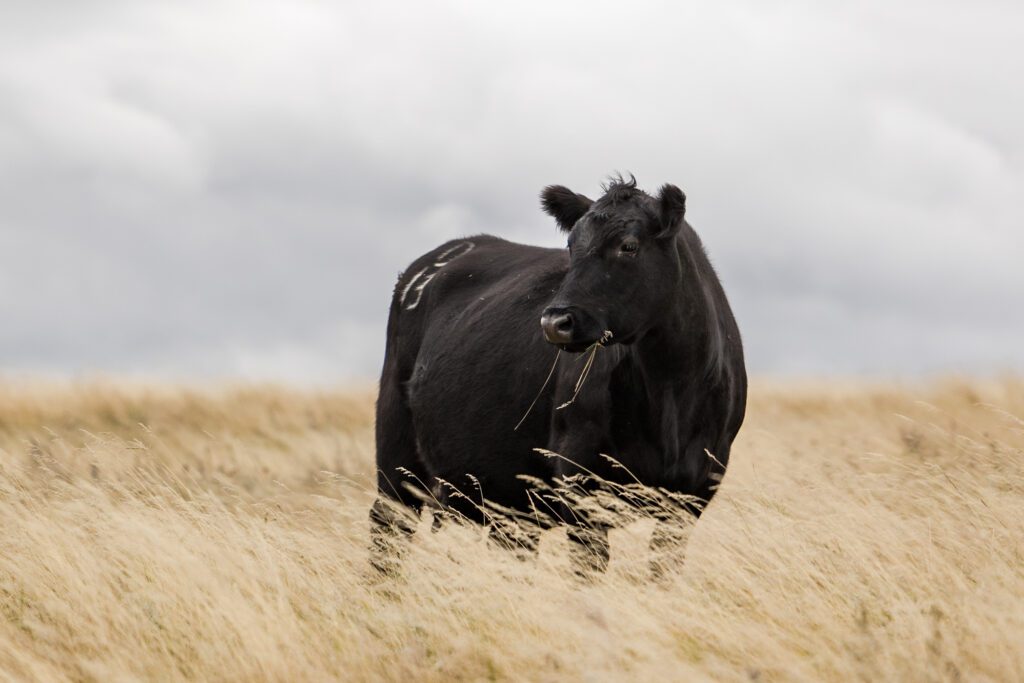
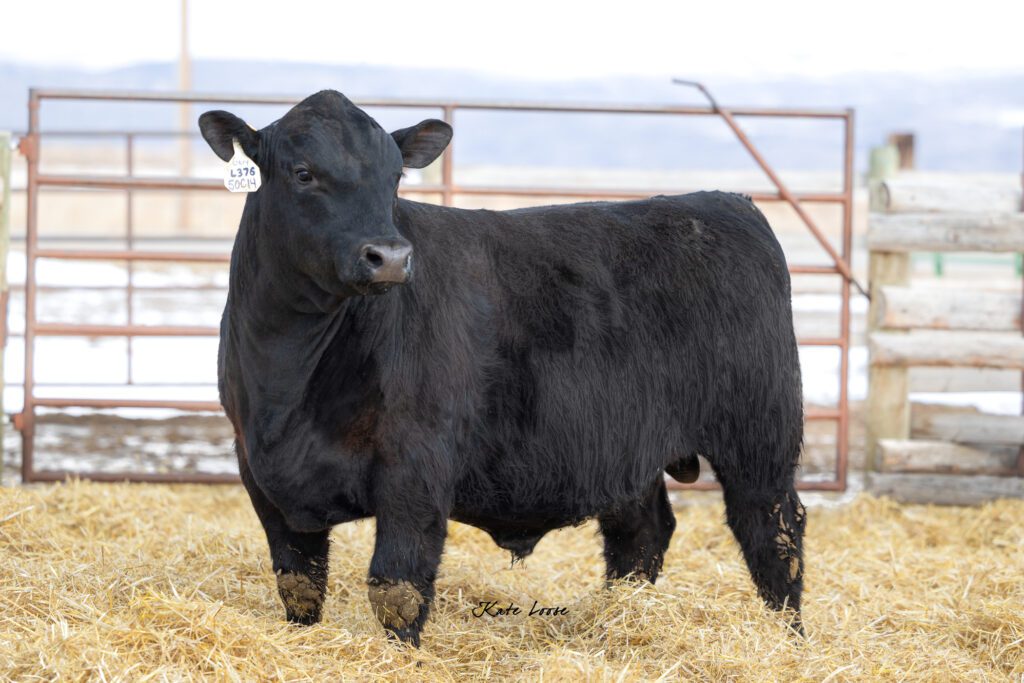
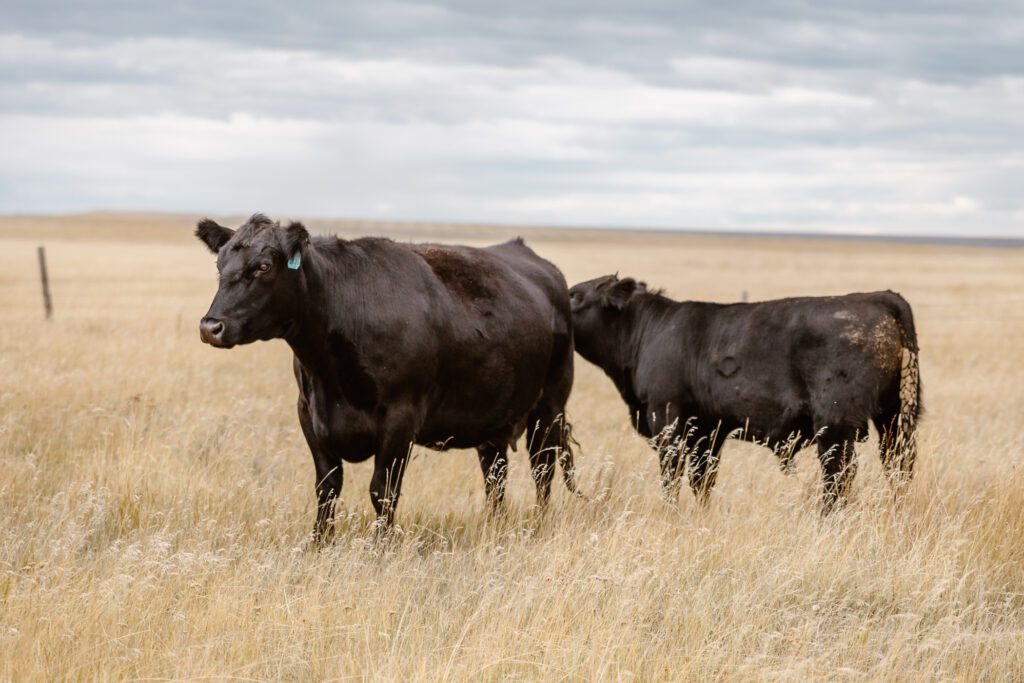
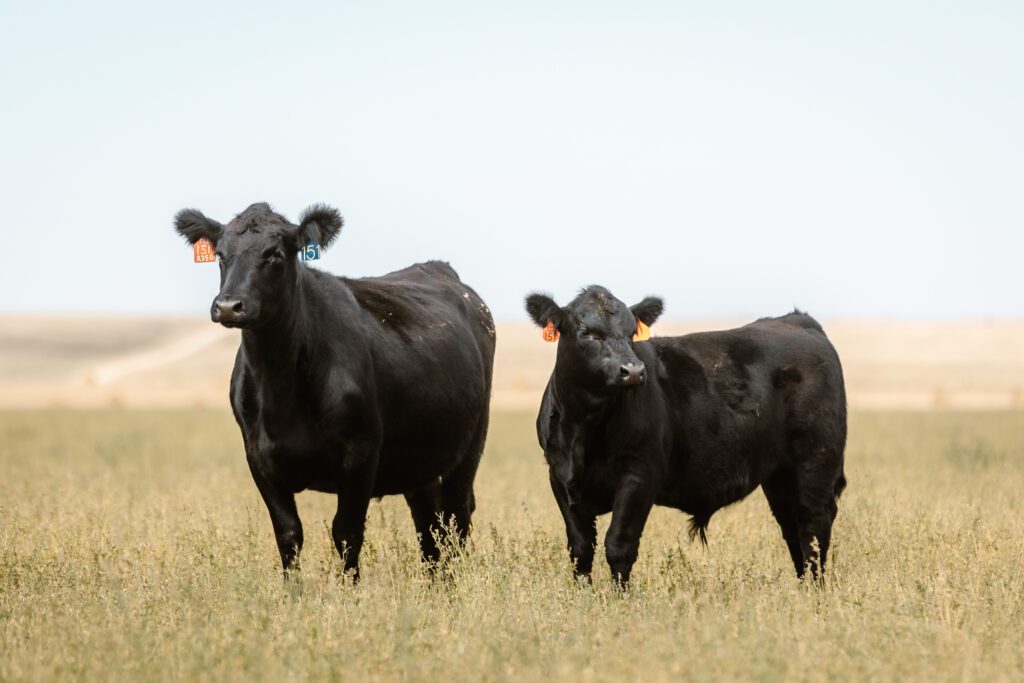
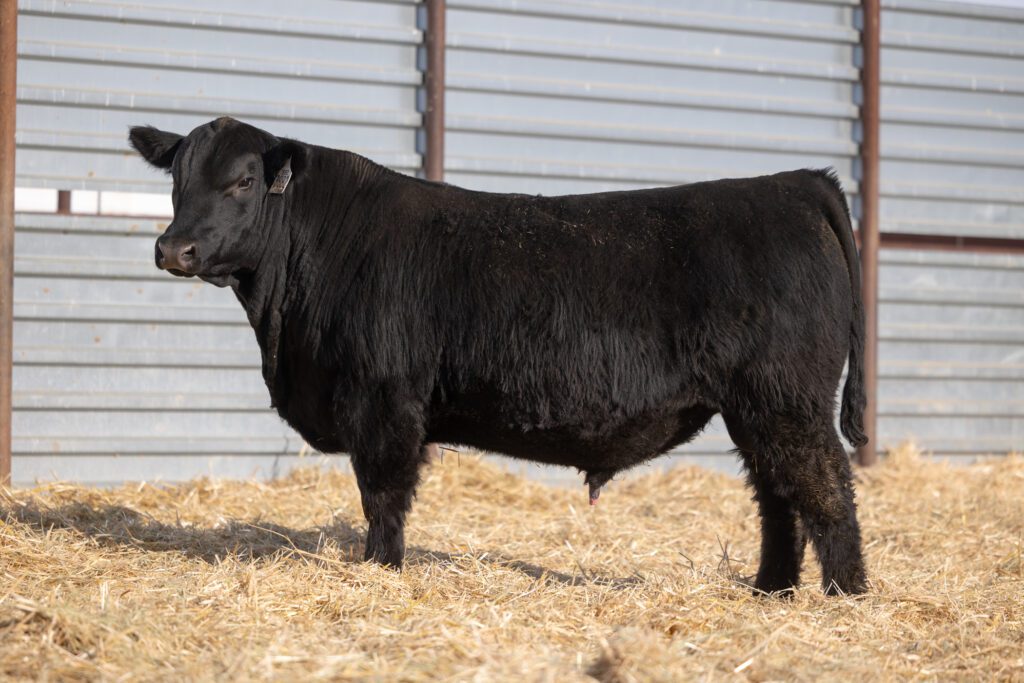
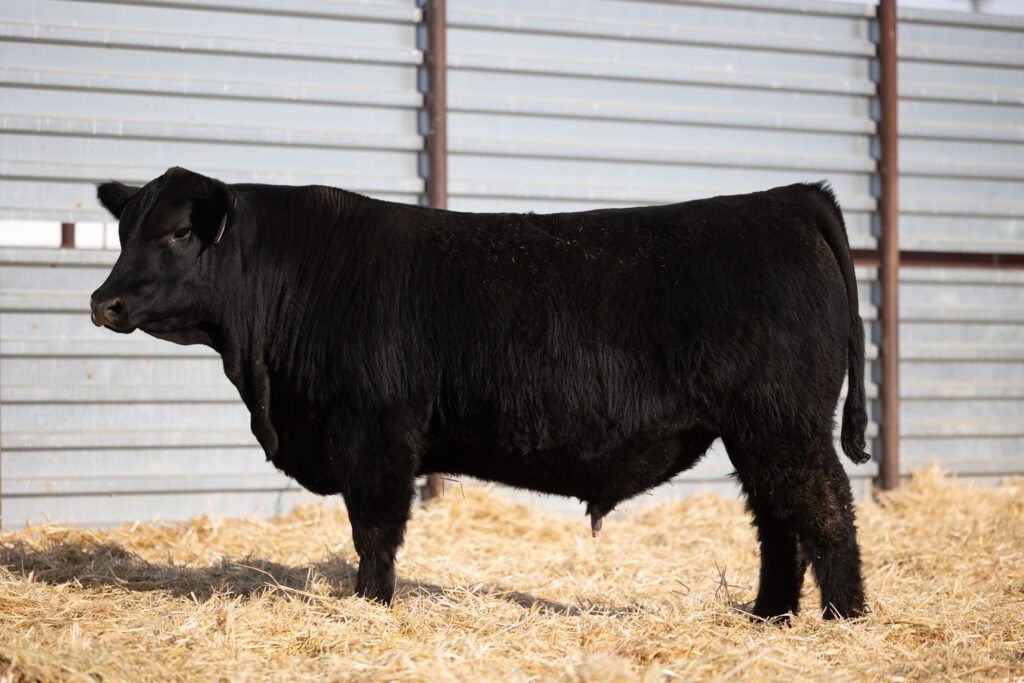
During midday photography sessions, it’s often challenging to entirely eliminate shadows. However, positioning the sun directly on the animal, rather than at angles toward the front or back, can significantly reduce the presence of dark areas. For instance, in comparing two photos, the one on the right with direct sun lights the animal’s body more evenly which gives it a fuller appearance, whereas the other, with angled sunlight, shows prominent shadows. It’s worth noting that shadows tend to accentuate crevices in the body, which could lead to the animal looking less full.
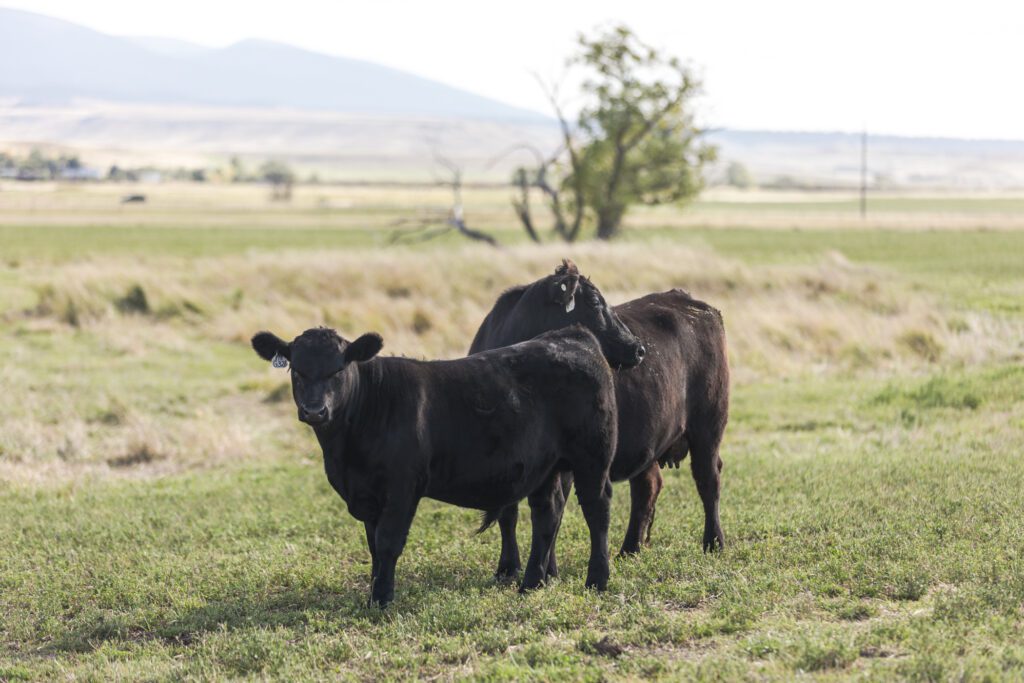
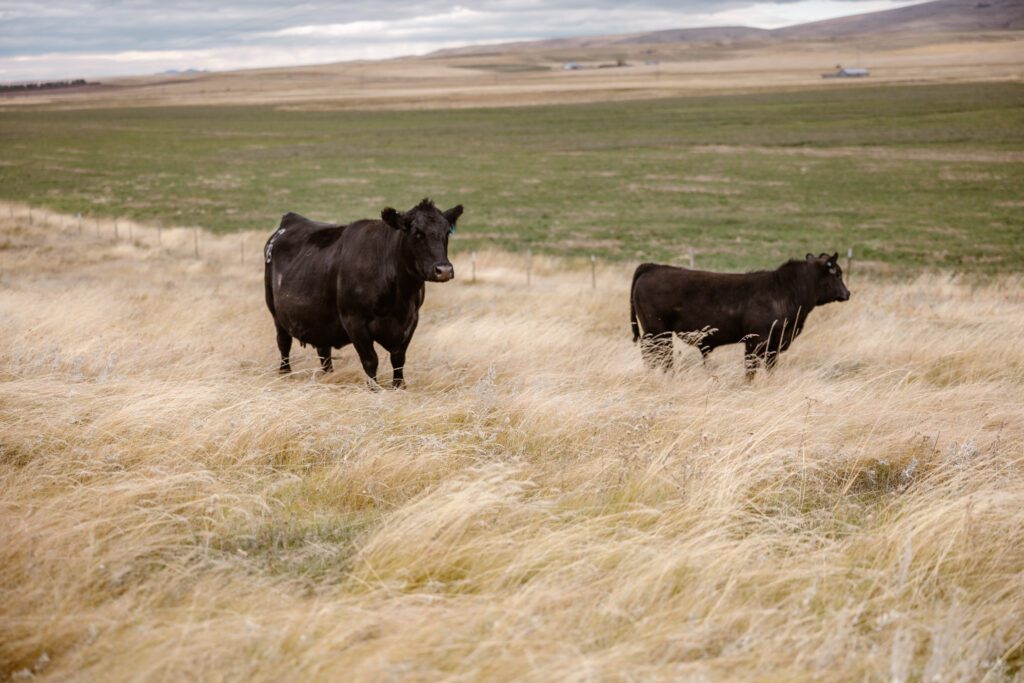
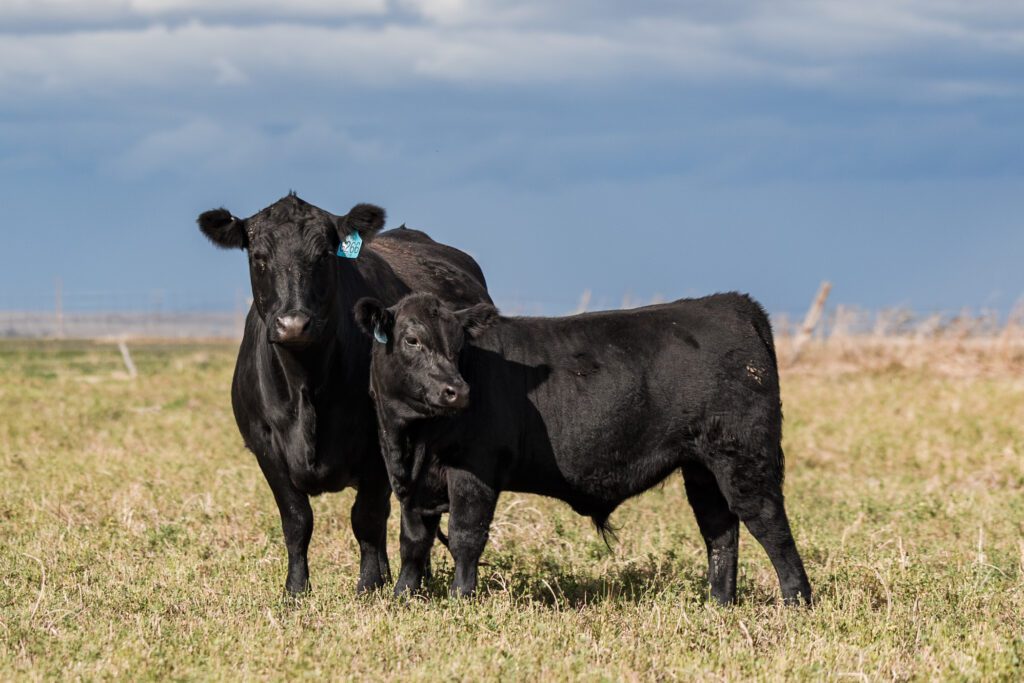
Above: Another example of poor lighting. The sun was directly behind the cow and calf.
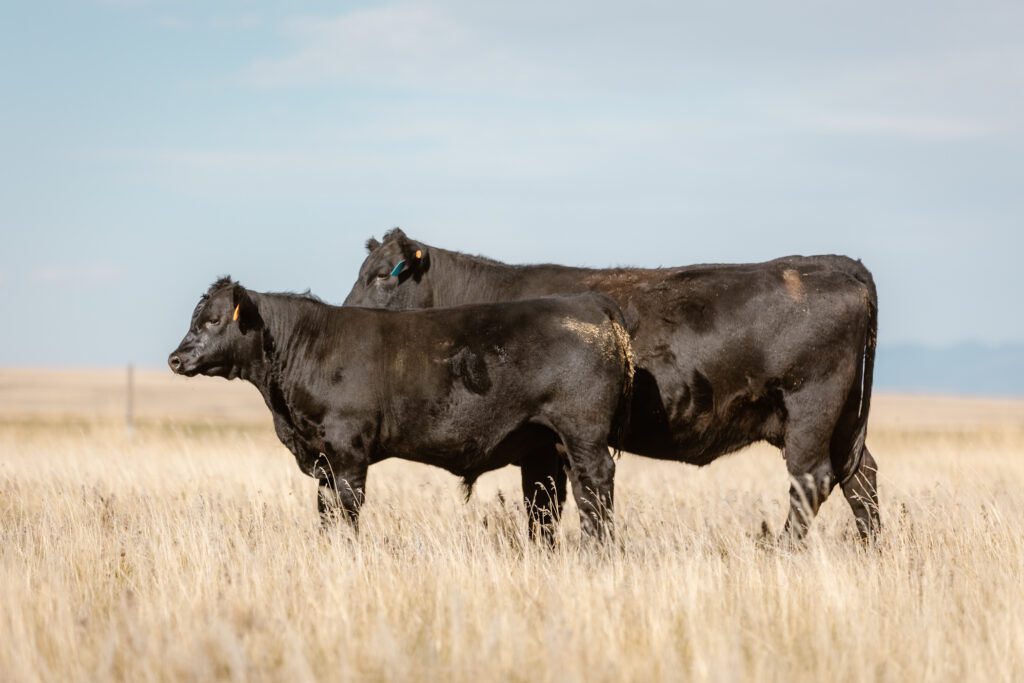
Above: This would be an example of good lighting. No harsh shadows. The sun was almost directly behind me when I took this photo.
Angles
To take great cattle photos they require certain angels to help them look their best. Each animal has specific qualities we want to mask and qualities we want to accentuate. As a rule, I always use a telephoto lens, which is a lens that makes things appear to be closer. In other words, you can zoom in. This allows for two things. One you don’t have to be close to the cattle to get a good photo and two, a zoom lens compresses an image, meaning it makes things in the distance look closer to things in the foreground. Cattle have a long body and when you use a telephoto lens it tends to compress their body, reducing the distortion and giving the appearance of width and proportion. You can shoot at a three-quarter angle from the front or back or a side angle. If done correctly they can all look good. The priority: be sure the finished photo best represents the animal.
Shooting from the animal’s eye level or lower also makes a huge difference. It all depends on the animal’s confirmation and what best represents them. When you are taking the photos, play around and take as many shots as you can. Then you can choose the best ones from that group of photos.
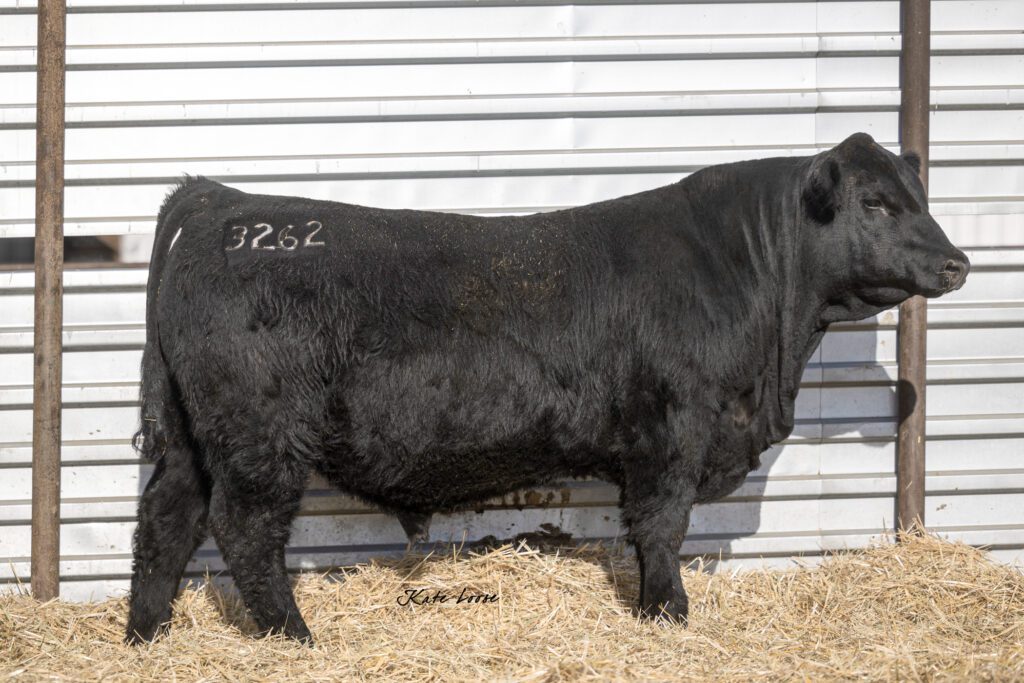
Above: An example of a good 3/4 angle of a cow. She looks full and proportionate. I used a telephoto lens to zoom in on her.
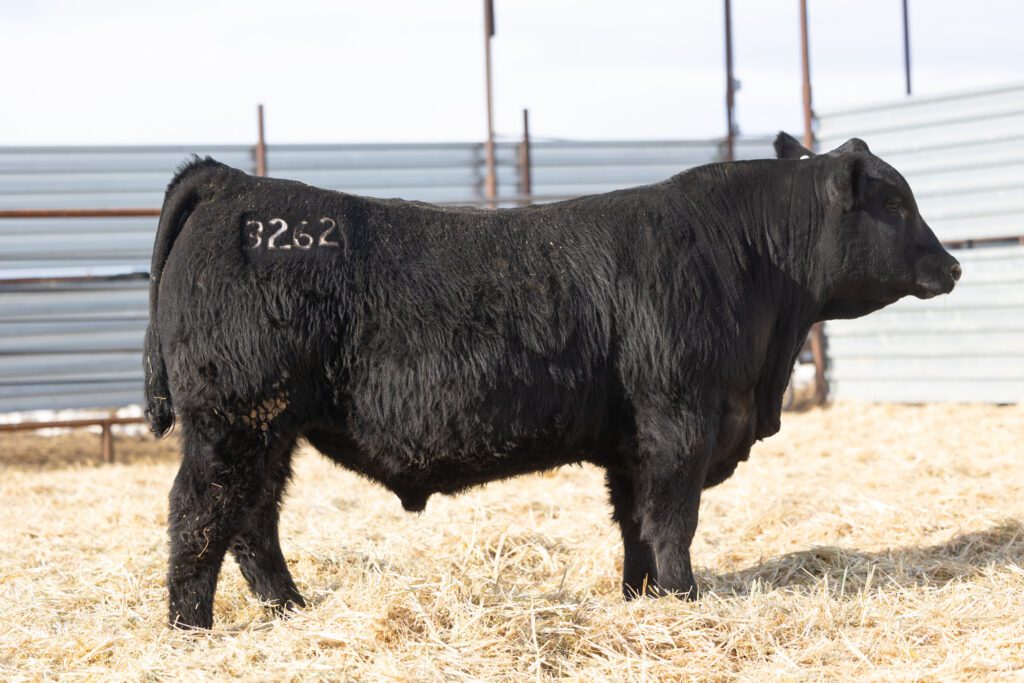
Above: An example of a cow at a 3/4 angle but this time I was not using a telephoto/zoom lens. You can see that she looks longer bodies and less compressed.
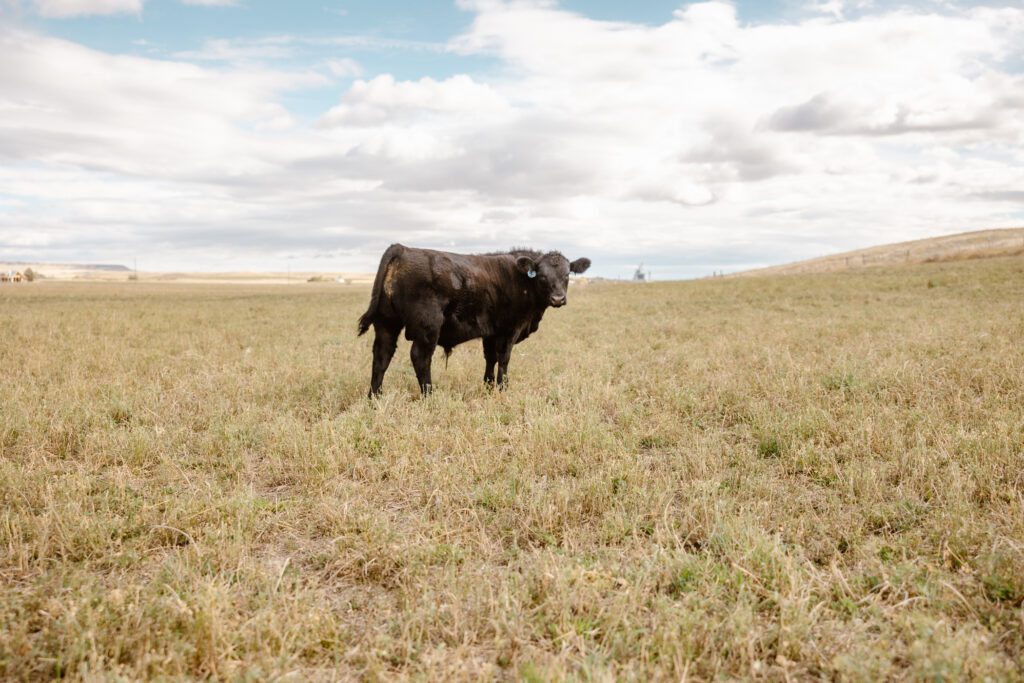
Above: An example of not the best angle. This was shot without using a zoom lens and the calf looks less proportionate and too far away from the camera. When you take a photo, try to fill the frame, meaning leave less sky and grass and fill the image with your subject.
Foot Placement
In order to get great cattle photos, I am very particular about foot placement on cattle. This can make or break a photo. When they stand you want them to look balanced, comfortable, and proud. A square in the front legs and off-set back legs is preferable. For bulls you want the back leg closest to you to be back exposing their scrotum if you can. Same for lactating cows. With that being said, there are many rules, but sometimes they are meant to be broken. There will be times that cattle will not cooperate and you have to just get the best shot you can. Other times they will actually look better with the opposite leg back. In the end, you have to discern what looks best for each animal and what works for the situation.
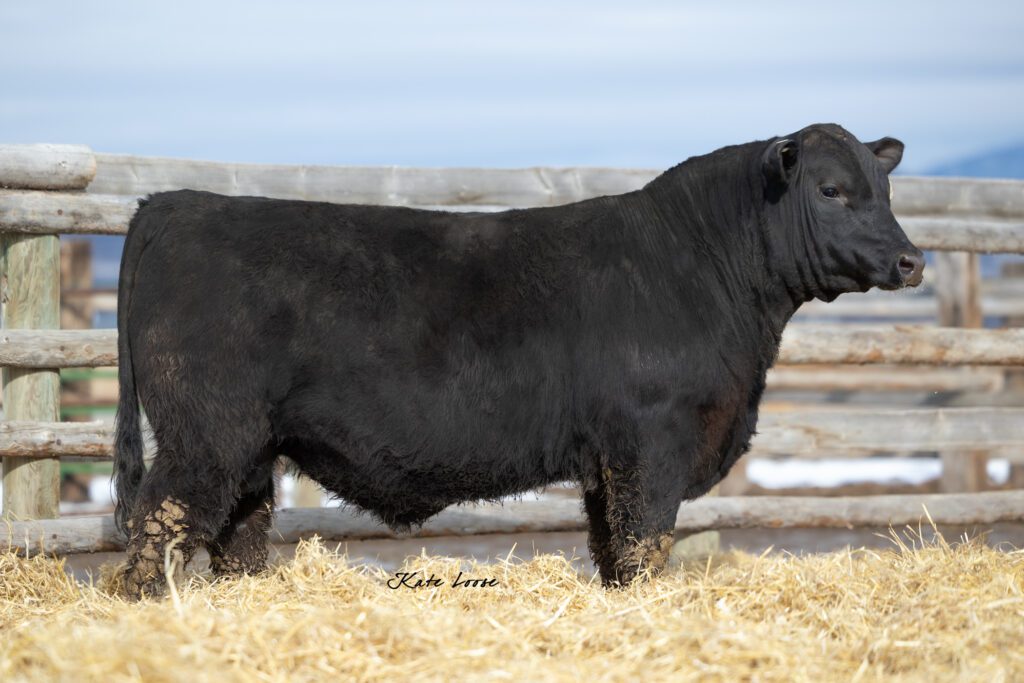
Above: Impecible foot placement. These bulls seem balanced and solid like they are placing equal weight on all 4 legs. They are spread evenly and they look like they are rooted into the ground.
Backgrounds
Backgrounds are important. I always try to be sure my background is clean and uncluttered. If you are going for a photo that markets your business rather than a photo of a specific animal, you want to incorporate a background that tells a story. If the historic barn is a landmark for your ranch, use it in the background in a creative way. Maybe the mountains are what distinguish you from other locations. Try to incorporate them.
To get t a great cattle photo, watch out for clutter, excess animals, machinery etc. Try to make it as clean and clear as possible. This helps the animal really stand out so that all eyes are in them and not being pulled away by distracting background elements.
When it comes to backgrounds in your cattle photography, clean uncluttered backgrounds are key. If you’re choosing to take a photo to promote your business, consider incorporating backgrounds that tell a story. For instance, if there’s a historic barn or stunning mountain range on your ranch, feature them creatively to add depth and character to your images. However, when you’re focusing on photographing a specific animal, be meticulous about eliminating clutter and distractions from the background. Whether it’s excess animals, machinery, or anything else that could divert attention, eliminate those to help your animal stand out without any competing elements to distract.
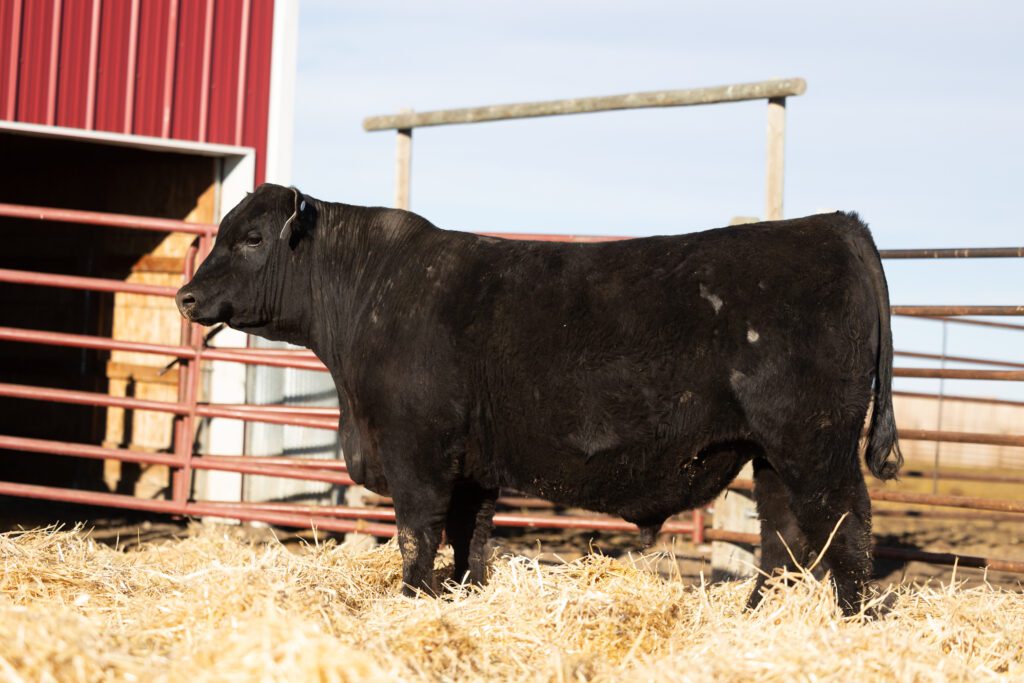
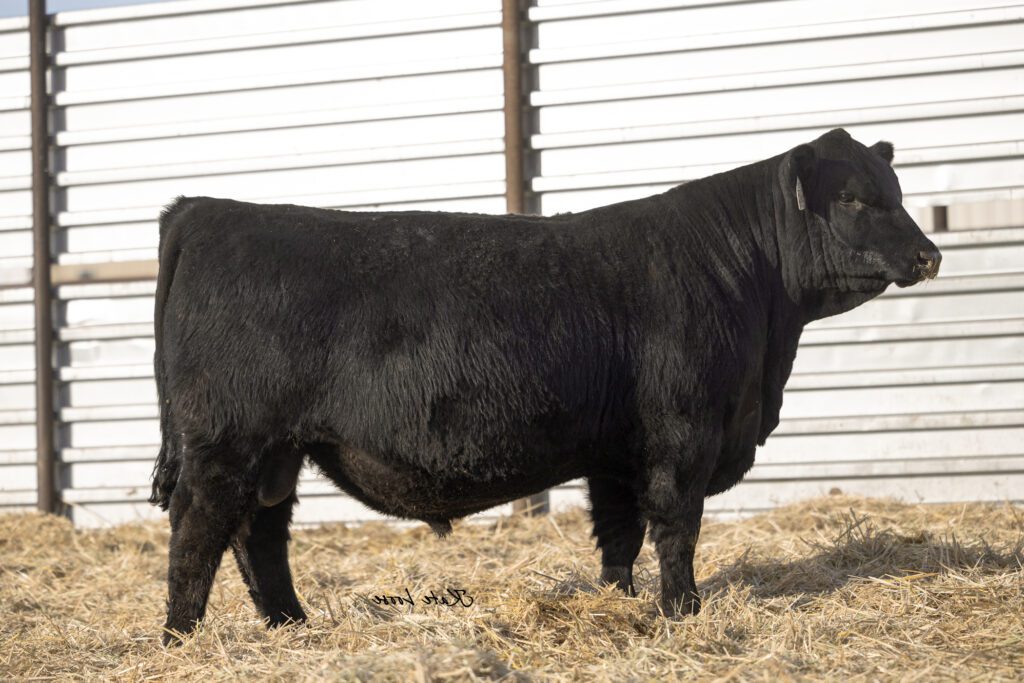
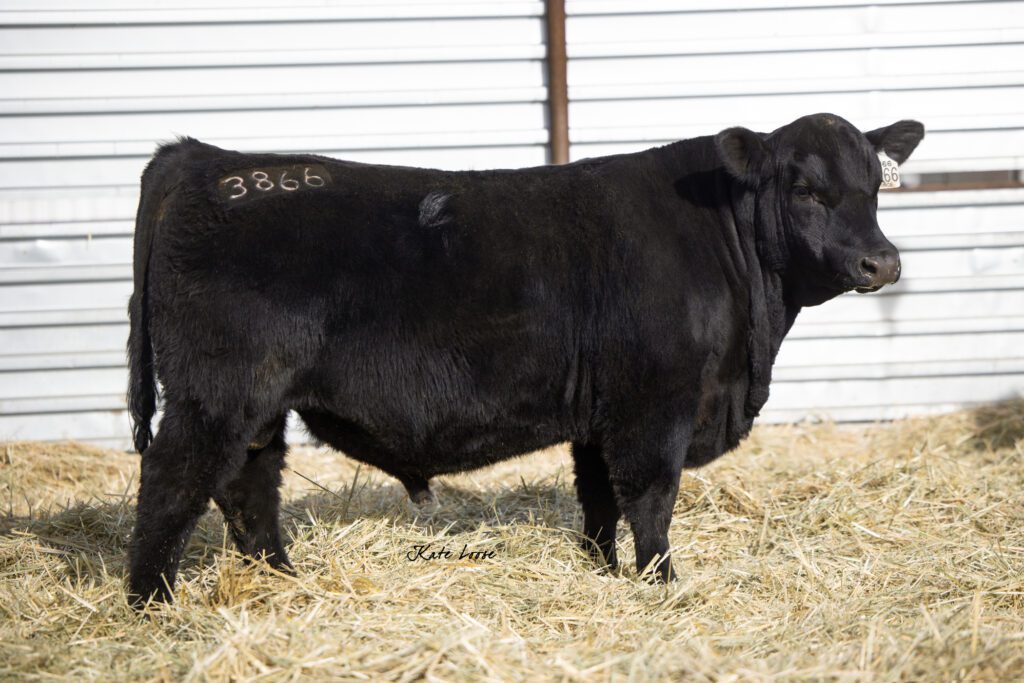
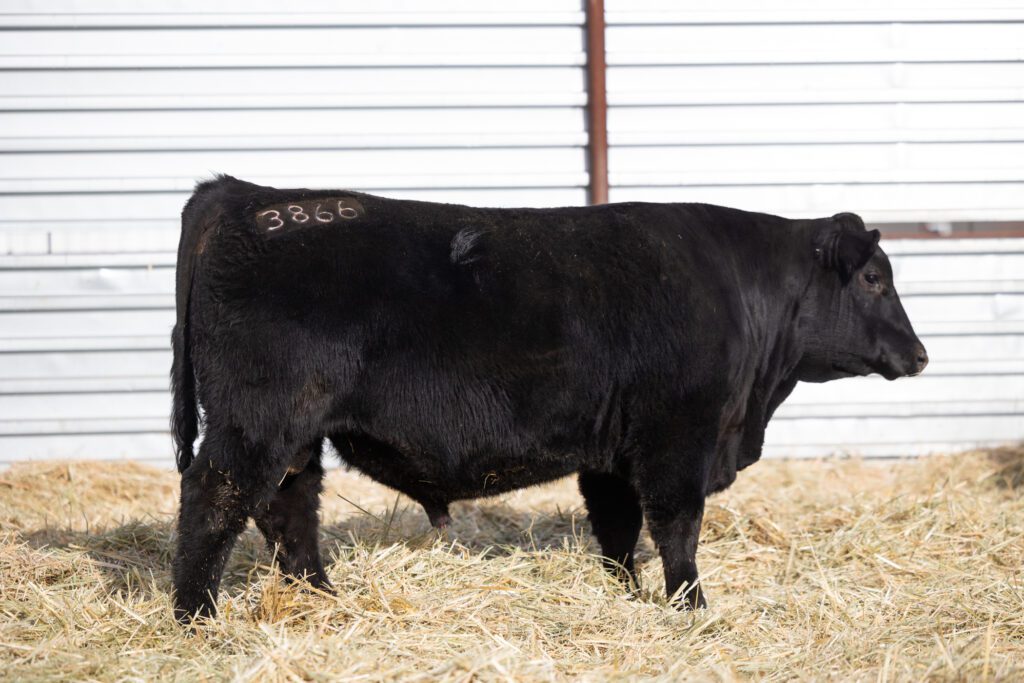
Above: The left is an example of a very busy and cluttered background. On the right is a much cleaner background that helps the bull stand out. The viewer is immediately drawn to the bull and is not distracted by the clutter.
Above: Another example of a very clean background. The only thing I would add here is mountains.
Allow Enough Time
Always give yourself plenty of time. Great cattle photos take lots of patience at times. They are animals after all, with a mind of their own. I am very particular about what kind of mood I and my help are in when I am around them. They feel your presence and if you have an agenda, it’s pretty certain they will avoid your efforts. But if you approach them with the attitude that you are there to appreciate them and enjoy their company, they tend to cooperate a lot better. If I am rushed and think I can get something done in a certain amount of time, the animals usually prove me wrong. But if I have an open schedule and no expectation of how things should go, it’s usually completed much more quickly.
Weather
Weather is a very important factor for a couple of reasons. First your lighting. I like to photograph on a sunny day. For two reasons: The full sun really helps the animals stand out from the background. If positioned correctly there can be very few shadows on the animal’s body. The second reason is with full sun you will have vibrant colors in your photos.
Choose a day when the wind is not blowing. Wind can affect the animals as well as the people’s temperament. A soft breeze is one thing, but an actual wind tends to stir up the animals up and make them more reactive to what you are asking of them. I always try to choose a sunny calm day if I can.
As far as snow goes, you can’t photograph when the snow is flying because all the snowflakes will show up in your photo. I also suggest AGAINST shooting during a full moon. It may sound like an old wives tale but I have witnessed over and over again how the moon affects animals. If it can move something as massive as the ocean, it can definitely have an effect on the mood of an animal.
Expression
Just like a person, animals have expressions and posture that can dramatically change the feel of the photograph. A sleepy animal does not make for a good photo. These animals are bred to go to work for your customer, and if they look overly lazy or disinterested, they will not capture the attention of a buyer. On the other hand, we don’t want them looking crazy either. They need to look alert and proud. It’s like taking a photo of a person and they are slouched and frowning. That would not be their best shot. But a smile and a warm inviting look can really draw you to that person. It’s the same for animals.
Above: Although this cow had her ears forward, there is something about this photo that just doesn’t grab my attention.
Above: This one does a much better job!
Above: Both are examples of great expression on the left and poor expression on the right.
Take lots of photos
My last suggestion is to take lots and lots of photos. As soon as your animal gets into the position you want, take several photos from different angles. As a rule, I usually squat down to their eye level and take several shots from the center of their body and then lean toward their back quarter and then to their front quarter. I suggest taking a lot of photos because you never truly know what will be the best angle until you look them over on a larger screen like your computer. On the subject of capturing their ears forward, take several photos in a row. They may only hold their ears forward for a brief moment so continually snapping photos will increase the likelihood that you will catch that moment. Some other things to watch out for are swishing their tail or blinking. It can be frustrating to get back to the computer and see that you got a great photo but their eye is closed.\
These are just a few of the tips that I offer here. By implementing these tips and techniques, you can elevate your cattle photography skills. Remember, practice makes perfect, so don’t be afraid to experiment and refine your approach over time. With a little time and patience, you’ll be able to use your own photos to market your animals.
With all that being said, a good camera can go a long way as well toward helping you achieve great photos. Check out my guide HERE on how to choose a beginner camera and lens.
Or check out my blog post about “Marketing the Best of Your Ranch: The Value of Summer Cattle Photos”


This was a very helpful article! Thank you Kate! I’ll maybe have to see if I can try out these tips when we take pictures of our R&R Cattle Charolais bulls 🙂
I’m so glad it was helpful Erin!